
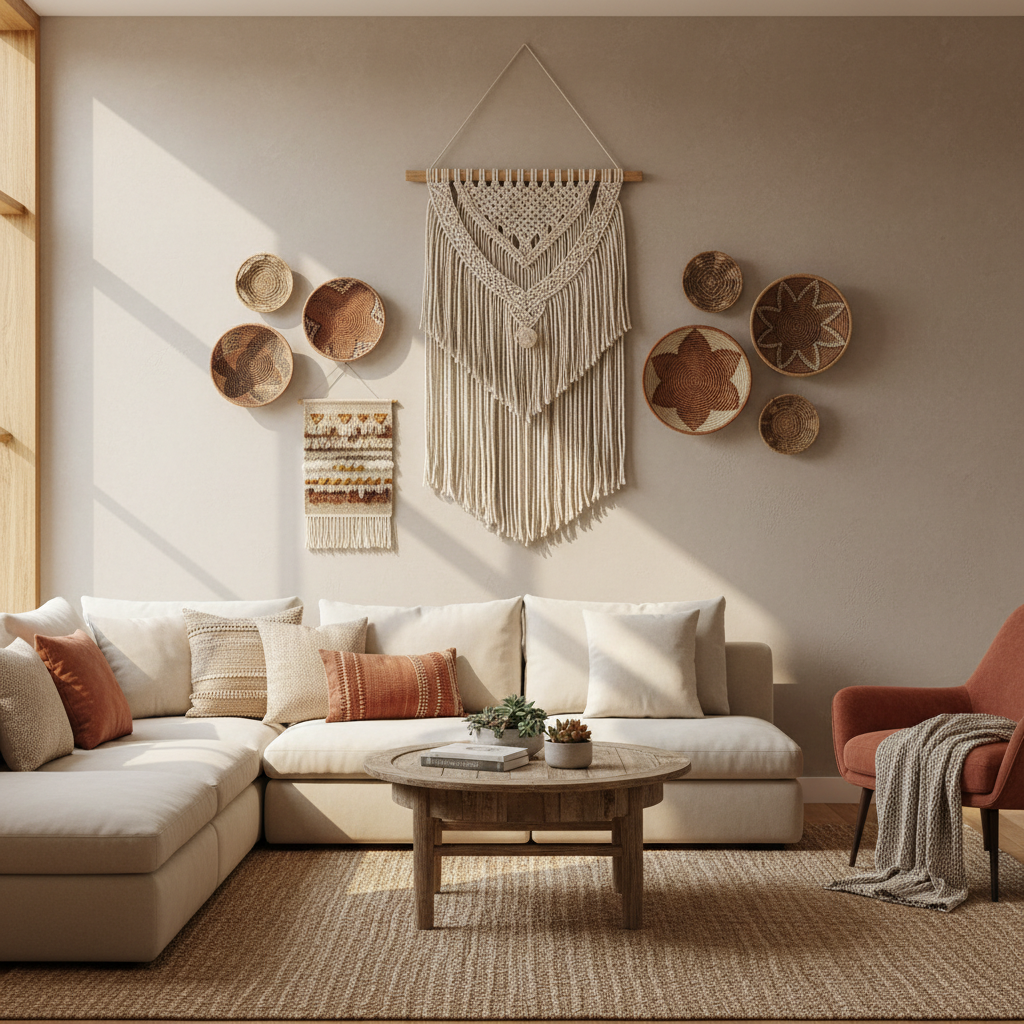
Boho style wall hanging decor diy ideas work best when you pick one “anchor” piece for the wall, then build texture around it with a couple of smaller accents.
If you’ve ever tried boho wall decor and ended up with something that looks messy instead of relaxed, you’re not alone, the line between “collected” and “cluttered” is thin. The good news is that most boho wall hangings follow a few repeatable rules: natural fibers, warm neutrals, and intentional layering.
This guide gives you easy DIY options you can finish in a weekend, plus a quick way to decide which project fits your wall size, tools, and patience level. I’ll also point out the spots people waste time, like choosing the wrong cord thickness or hanging everything at the same height.
What makes a wall hanging “boho” (so your DIY reads right)
Boho is more about texture and contrast than any single pattern. When a DIY looks “off,” it’s usually because it’s missing one of these signals.
- Material story: cotton rope, jute, raffia, rattan, linen, driftwood, unfinished dowels, clay beads.
- Soft geometry: arches, diamonds, fringes, imperfect symmetry, hand-tied knots.
- Palette discipline: 2–3 neutrals plus one accent (terracotta, olive, dusty rose, indigo).
- Layering: one large focal piece with smaller supporting pieces that echo its texture.
Also, lighting matters. According to U.S. Department of Energy, using daylight effectively can reduce the need for artificial lighting in many situations, and for wall decor that means textures look richer when placed where they catch side light instead of flat overhead light.
Quick self-check: which DIY is right for your wall and time?
Before buying cord or drilling holes, match the project to your constraints. This table keeps you from choosing a “cute” idea that becomes a half-finished pile.
| DIY option | Best for | Time | Skill | Budget range |
|---|---|---|---|---|
| Mini macramé (simple knots) | Small walls, renters, gifts | 1–2 hours | Beginner | $10–$25 |
| Driftwood + fringe yarn hanging | Cozy bedrooms, above nightstands | 1–3 hours | Beginner | $15–$35 |
| Woven hoop (no loom, needle weave) | Entryways, gallery walls | 2–4 hours | Intermediate | $20–$45 |
| Basket wall cluster | Big blank walls, fast impact | 1–2 hours | Easy | $30–$120 |
| Textile tapestry + dowel | Color lovers, easy seasonal swap | 45–90 min | Easy | $15–$60 |
- If you hate measuring, avoid projects that require perfectly even cord lengths.
- If your wall gets direct sun, pick colorfast textiles or keep them out of the brightest window line.
- If you need “wow” with low effort, baskets or a tapestry usually beat knot-heavy macramé.
3 easy boho wall hanging DIYs you can finish in a weekend
These are the most forgiving options, meaning small mistakes still look intentional, which is kind of the whole vibe.
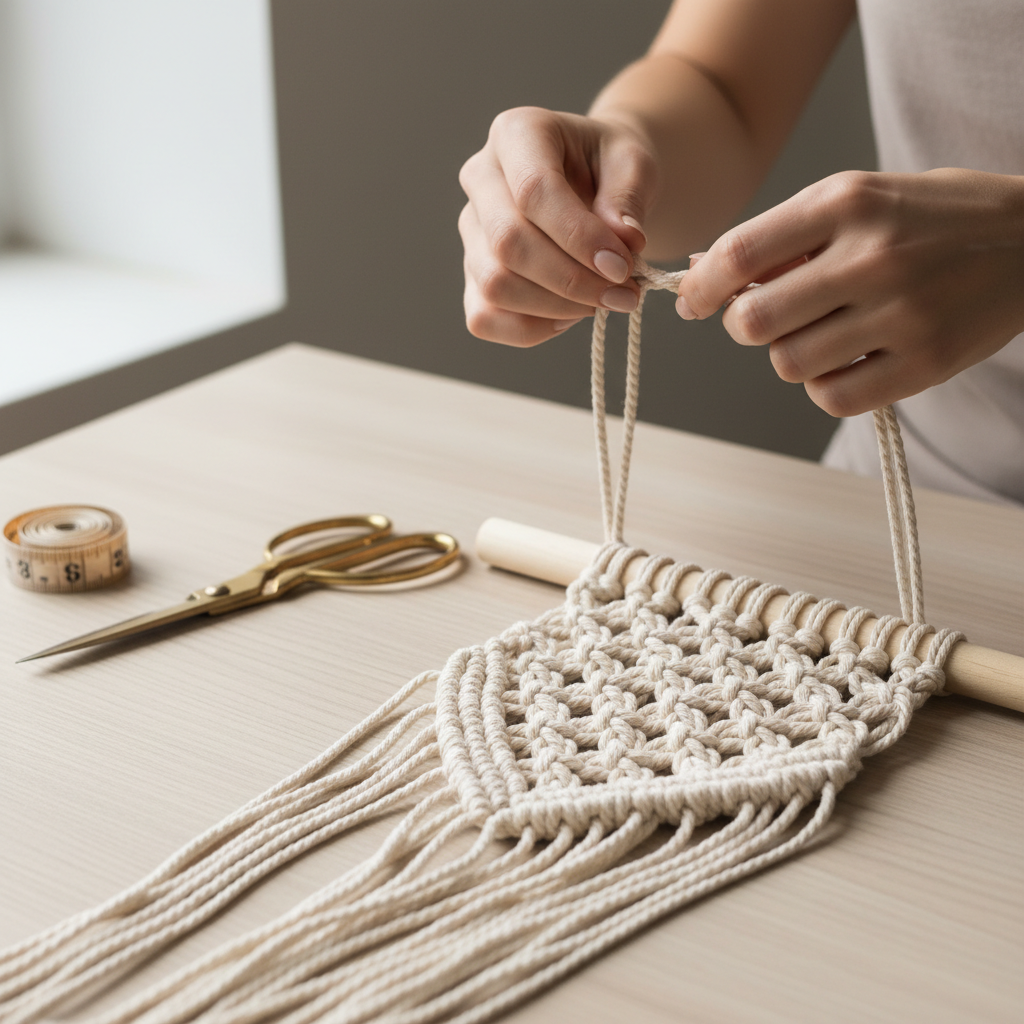
1) Minimal macramé with two knots (square knot + lark’s head)
This is the gateway project for boho style wall hanging decor diy ideas, it teaches the basics without demanding perfect tension from day one.
- Materials: 3–5mm cotton cord, wood dowel (12–18 in), scissors, measuring tape, optional beads.
- Cutting guide: start with cord lengths about 4x the finished hanging length, longer is safer than shorter.
- Build: attach cords with lark’s head knots, then work rows of square knots, finish with fringe, trim into a V or shallow arch.
Editor’s tip: if your knots look uneven, don’t restart, steam the finished piece lightly and comb the fringe, it often “settles” into a more natural look.
2) Driftwood fringe hanging (fast, soft, forgiving)
If you want texture without learning knots, fringe is your friend. You’re essentially building a “textile waterfall,” and it reads boho instantly.
- Materials: driftwood or a branch, yarn (2–4 colors), twine, hot glue (optional).
- Build: cut many yarn strands, fold each in half, loop onto the driftwood with a lark’s head, then trim into a gentle curve.
- Style move: keep 70–80% of strands in one neutral, use the rest as accent stripes.
Hot glue can help lock ends, but use it sparingly, shiny glue spots can look crafty in the wrong way.
3) No-loom woven hoop (cleaner look, still handmade)
This one works well if you like boho but prefer a slightly more modern finish. A hoop also makes hanging easy, one nail, done.
- Materials: embroidery hoop, chunky yarn, tapestry needle, a bit of cotton cord for hanging.
- Build: wrap the hoop with yarn for coverage, weave over-under with thicker yarn, add a few “puffs” or tassels for depth.
Common win: mixing yarn thicknesses (thin + chunky) creates depth without extra patterns.
How to style boho wall hangings so it looks curated, not random
Most walls don’t need more decor, they need better spacing. These rules keep your DIY from feeling like it’s floating.
- Hang height: center of the main piece around 57–60 inches from the floor is a common gallery guideline, but adjust for sofas and headboards.
- Give it a “frame”: place the hanging above a bench, credenza, bed, or plant, empty wall with no anchor tends to feel unfinished.
- Use one repeated element: repeat a color (terracotta), a material (rattan), or a shape (arches) across the wall.
- Limit micro-items: lots of tiny pieces can read dorm-room. If you want many items, group them tightly as a gallery wall.
If you rent, removable hooks can work for light pieces, but weight ratings vary by wall paint and texture, so test cautiously and follow the manufacturer’s instructions.
Tools, hanging methods, and safety notes (quick but important)
Boho decor often uses dowels, branches, and baskets, which means uneven weight distribution. It’s not complicated, but it’s worth being deliberate.
- Drywall anchors: helpful for heavier pieces, choose based on your wall type and the item’s weight.
- Stud mounting: best for heavier basket clusters or large woven pieces, a stud finder saves guesswork.
- Command-style strips: can work for lightweight textiles, avoid humid areas where adhesives may fail.
According to CPSC (U.S. Consumer Product Safety Commission), tip-over and falling hazards in the home can injure children, so if your wall decor hangs above a crib, play area, or where kids climb, it’s smart to use more secure mounting or relocate the piece.
Mistakes that waste time (and how to avoid them)
You can make a charming wall hanging with basic supplies, but a few predictable mistakes cause most “why does this look weird?” moments.
- Cord too thin for the scale: on a large wall, skinny cord reads flimsy. Go thicker or go smaller.
- All neutrals, zero contrast: boho neutrals still need contrast, add one darker tone or a wood element.
- Over-trimming fringe: once you cut too short, you can’t uncut. Trim gradually, step back often.
- Wrong wall context: a delicate macramé piece can disappear on a busy wallpaper wall, choose bolder texture or a hoop shape.
- Ignoring maintenance: fringe collects dust, if that will annoy you, choose a basket cluster or a tighter weave.
Practical finishing touches that make DIY look store-bought
This is the part people skip, then wonder why the project looks “homemade” in a bad way.
- Steam and shape: a handheld steamer can relax fibers, keep distance and test first so you don’t scorch yarn.
- Comb fringe: a wide-tooth comb helps separate strands, especially cotton rope.
- Hide the hanger: use matching cord, or a leather loop, so the hanging method feels intentional.
- Protect from dust: quick vacuum with a brush attachment on low suction works for many textiles.
If you’re gifting, add a simple care note, like “keep out of direct moisture” or “spot clean only,” it sets expectations and keeps the piece looking good longer.
Conclusion: a simple plan for a wall you actually like
Boho style wall hanging decor diy ideas land best when you commit to one main texture, keep the palette calm, and hang with spacing that makes the wall feel intentional. Pick a project that matches your time and tolerance for fiddly details, then spend the last 15 minutes on trimming, steaming, and hanging height, that’s where the “finished” look comes from.
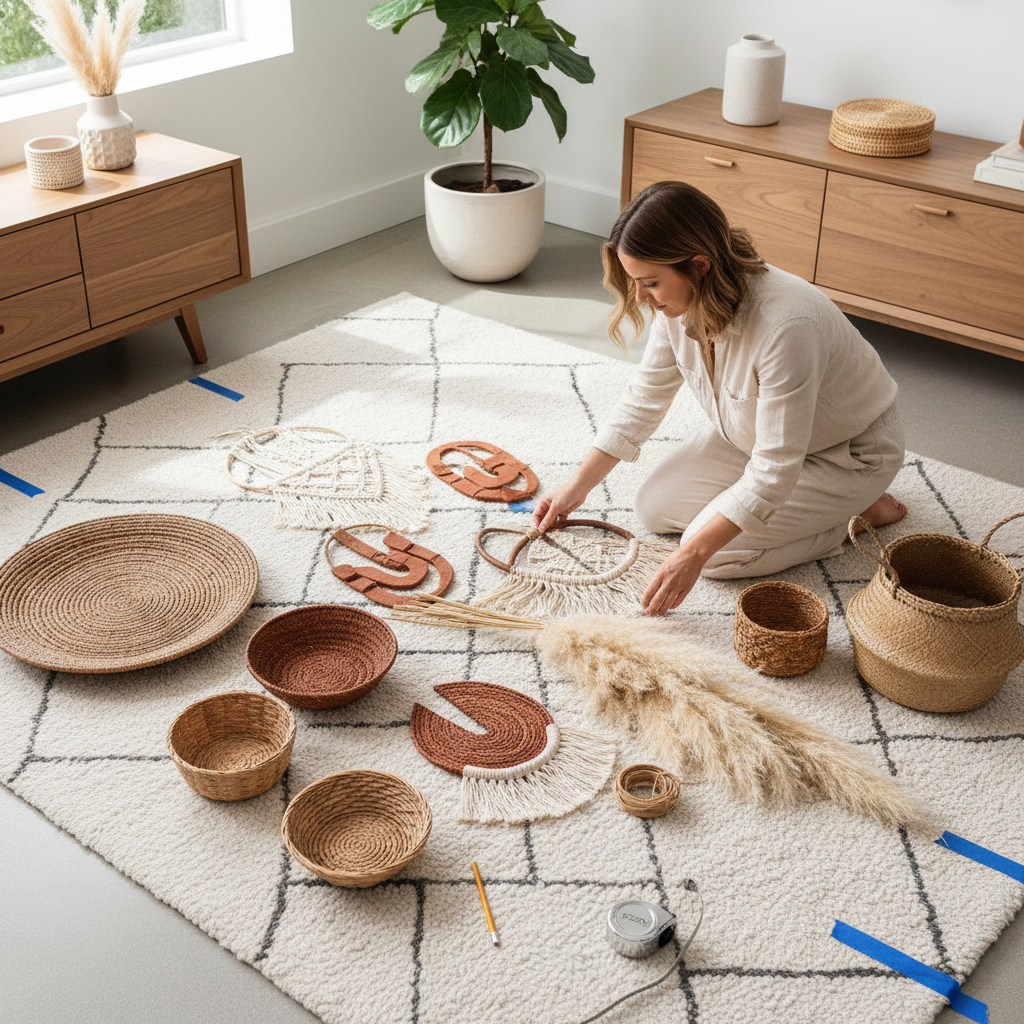
If you want a quick next step, choose one DIY from the table, gather materials in a single trip, and mock up placement with painter’s tape before you put anything on the wall.
Key takeaways
- Scale beats complexity: a larger, simpler piece often looks better than a tiny, intricate one.
- Texture needs light: place wall hangings where side light can show depth.
- Finish matters: trim slowly, comb fringe, and use clean hanging hardware.
FAQ
- What are the easiest boho wall hanging DIYs for complete beginners?
Mini macramé with basic knots, driftwood fringe, and a simple tapestry-on-dowel are usually the least frustrating because small imperfections still look natural. - How much cord do I need for a macramé wall hanging?
A common rule is 3–4x the finished length per strand, sometimes more for knot-dense patterns. If you’re unsure, buy extra, running short mid-project is the fastest way to lose momentum. - How do I make boho wall decor look modern, not overly “festival”?
Use a tighter palette, cleaner shapes like hoops or arches, and limit tassels. Mixing one crisp element, like a black frame nearby, can also balance the softness. - Can I do boho wall hanging decor in a small apartment?
Yes, but go vertical and keep the number of pieces low. One medium hanging above a narrow console can feel intentional without shrinking the room visually. - What if my wall hanging curls or looks uneven after I finish?
Light steaming and gentle shaping often helps, and hanging it for a day can let fibers relax. If it’s badly warped, it may be a tension issue in the knots, loosening and reworking a small section is sometimes easier than starting over. - Are basket wall clusters hard to hang evenly?
They can be, unless you plan on the floor first. Lay out the cluster, take a quick photo, then replicate spacing using painter’s tape marks on the wall. - What are budget-friendly alternatives to cotton macramé cord?
Yarn, jute twine, and thrifted textiles cut into strips can work, though texture and fraying differ. Test a small sample knot before committing to a full piece.
If you’re building a boho wall but want it to look cohesive fast, a simple approach is to start with one ready-made anchor piece and add one DIY accent that matches its fibers and color, you still get the handmade feel without turning the whole weekend into a craft marathon.