
diy fabric headboard cover for easy update is one of those projects that looks high-effort, but in many bedrooms it’s really a smart way to hide wear, change color, and make the whole space feel newer without buying a new headboard.
If your headboard is stained, dated, or just not your style anymore, a fabric cover can be a cleaner fix than paint, and often more forgiving than full reupholstery. You can also take it off later, which matters if you rent or if you change your mind every few seasons.

The part people underestimate is fit: corners, thickness, and how you’ll secure fabric so it stays smooth. This guide walks through quick checks, material choices, and a few methods from no-sew to staple-on so you can pick what matches your headboard and comfort level.
Pick the right approach for your headboard shape
Before buying fabric, decide which style of cover you’re making. The goal is an easy update, not a wrestling match every time you make the bed.
Common headboard types and what usually works
- Flat panel (wood or upholstered): slipcover with elastic, tie-back cover, or staple-on wrap all work.
- Wingback headboard: tie-back or Velcro closure tends to behave better than elastic alone, since wings create extra bulk.
- Tufted headboard: removable covers can look great, but deep tufts may show through thin fabric; thicker fabric or a thin batting layer helps.
- Headboard attached to wall: measure carefully and plan fastening that doesn’t require lifting the whole piece.
If you want the easiest maintenance, aim for a removable cover you can take off for washing. If you want the crispest look, a staple-on wrap usually wins, but it’s less reversible.
Materials and tools (and what you can skip)
The fastest way to blow this project is choosing a fabric that looks good on a bolt but wrinkles, stretches, or snags once it’s on a vertical surface.
Fabric options you’ll see most often
- Cotton canvas: beginner-friendly, stable, affordable, reads casual.
- Linen or linen blends: elevated look, but wrinkles more; blends are often easier.
- Upholstery fabric: durable, hides texture, can be thicker to work with.
- Velvet: rich look, shows pressure marks and nap direction; plan layout carefully.
According to the U.S. Consumer Product Safety Commission (CPSC), you should keep open flames and heat sources away from flammable materials in the home. If your bed sits close to candles, space heaters, or wall sconces, choose placement and routines that reduce heat exposure, and when in doubt consider fabrics marketed for upholstery use.
Tools checklist
- Measuring tape, fabric scissors, pins or clips
- Iron/steamer (wrinkles show more on a headboard than you think)
- Sewing machine or iron-on hem tape for no-sew edges
- Optional: staple gun + staples (for wrap method), Velcro strips, elastic, upholstery batting
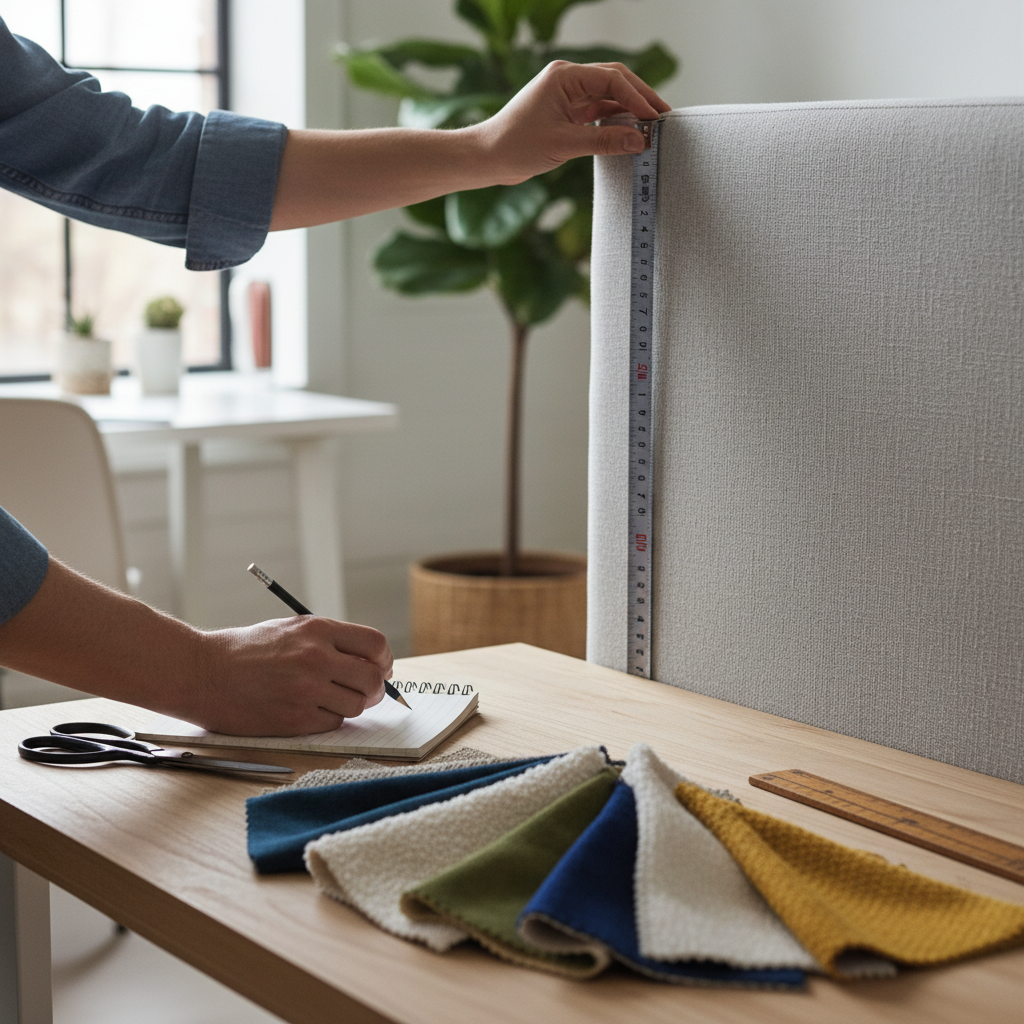
Quick measurement system (so you don’t buy the wrong yardage)
Measure once, then measure again from the perspective of how fabric will wrap. This is where most “why is it short?” problems start.
Use this simple formula as a starting point, then adjust for your design:
- Width = headboard width + (2 × thickness) + extra for hems/closure
- Height = visible height + (top wrap if needed) + (drop behind headboard) + hems
If you’re doing a tie-back cover, add extra length for the back panel so you can overlap and tie without pulling the front tight.
Yardage planning table
This table won’t replace measuring, but it gives a sanity check for common sizes. Assumes 54-inch-wide fabric and a basic slipcover with some wrap/hem allowance; patterns with large repeats often need more.
| Headboard size | Typical width | Often workable yardage (54" fabric) | Notes |
|---|---|---|---|
| Twin | ~41" | 2–3 yards | Add yardage for wings or tall profiles |
| Full | ~56" | 3–4 yards | Patterns may push you up a yard |
| Queen | ~62" | 3–5 yards | Tufting + thick padding benefits from extra |
| King | ~78" | 4–6 yards | Seams likely unless you use extra-wide fabric |
Self-check: which method fits your skill level and your patience?
If you’re after a diy fabric headboard cover for easy update, the “best” method is usually the one you’ll actually finish in an afternoon.
- I don’t sew and don’t want permanent changes: no-sew slipcover with hem tape + Velcro closure.
- I can sew straight lines: simple envelope-back slipcover (clean look, removable).
- I want it taut and hotel-neat: staple-on wrap (fast, crisp, less reversible).
- I have a wingback headboard: split panels or tie-back design, avoid one-piece tight elastic.
- I have pets: tighter weave upholstery fabric, darker tones, removable cover for washing.
Step-by-step: three practical ways to make the cover
All three methods start the same way: steam or iron fabric, then drape it over the headboard to preview how the pattern sits. If you’re working with stripes, check alignment from the doorway, not inches from the fabric.
Option A: No-sew Velcro slipcover (fastest, still tidy)
- Cut a front panel and a back panel using your measurements, leaving extra for a 1–1.5 inch hem.
- Use iron-on hem tape to finish raw edges, press firmly and let it cool fully before moving.
- Overlap back panels like an envelope closure, then add Velcro along the overlap so it doesn’t gap.
- Pull cover on, smooth from center outward, then adjust corners.
This option is forgiving, and it keeps the project in “fabric and iron” territory, which is why it works for many first-timers.
Option B: Envelope-back sewn slipcover (removable and cleaner)
- Sew hems on all panel edges.
- Place front panel right-side down, overlap the two back panels on top (right-side up), pin around edges.
- Sew around perimeter, reinforce corners, then turn right-side out.
- Fit it on the headboard, then decide if you want hidden ties inside to keep fabric from shifting.
For a diy fabric headboard cover for easy update that still looks tailored, this is usually the sweet spot.
Option C: Staple-on wrap (most polished, least removable)
- Remove the headboard if practical, lay it face-down on a clean surface.
- Add a thin layer of batting if you want a softer look and less texture show-through.
- Pull fabric taut, staple center top, then center bottom, then centers on each side.
- Work outward, alternating sides to keep tension even, fold corners neatly, then trim excess.
Use eye protection if you’re stapling overhead, and if the headboard has wiring for lights or outlets nearby, it’s worth pausing and getting help from a qualified professional.
Make it look intentional: small upgrades that change everything
Once the cover is on, the details determine whether it reads as “quick fix” or “new headboard.”

- Add piping: even simple solid fabric looks custom with contrasting piping (sewn option).
- Use a slightly oversized cover: tight covers show every bump, a touch of ease looks smoother.
- Coordinate, don’t match: pull one color from your rug, curtains, or throw pillows.
- Hide the closure: place Velcro or ties low and centered so it’s not visible from the sides.
Common mistakes (and how to avoid wasting a weekend)
Most issues aren’t “you did it wrong,” they’re “you picked a method that fights your headboard.” A few things to watch:
- Fabric that stretches on the bias: it sags over time, especially on tall headboards, choose a tighter weave.
- Ignoring pattern repeat: big florals and wide stripes may require extra yardage to look centered.
- Over-tightening corners: corners pucker, smooth fabric first, then secure in small adjustments.
- Skipping pressing: wrinkles don’t “fall out” on vertical fabric as quickly as people hope.
- Not planning for cleaning: if you have pets or kids, removable usually beats perfect.
Also, test for color transfer if you choose a dark fabric. A quick rub test with a white cloth can save you from staining light bedding in humid weather.
Key takeaways before you start
- Method choice matters more than fancy fabric, pick removable vs staple-on early.
- Measure for thickness and wrap, not just the front face.
- Pressing is part of the build, not a finishing touch.
- Plan your closure so the cover stays smooth and doesn’t creep upward.
Wrap-up: an easy update that still feels custom
A diy fabric headboard cover for easy update works because it solves the real pain point: headboards get visually tired long before they’re structurally done. If you measure for thickness, choose a stable fabric, and pick a method you can maintain, the result usually looks surprisingly intentional.
If you want a simple next step, start with a drape test using an old sheet, pin it where you’d place seams or closures, then commit to fabric once the fit makes sense.
FAQ
How do I keep a fabric headboard cover from slipping?
Usually the fix is internal tension, not more tugging. Add hidden ties around the posts or use Velcro at the back overlap so the fabric has an anchor point.
Can I make a cover without removing the headboard?
Yes, many slipcovers work fine in place. Just make sure you can reach behind for closures, if the bed is tight to the wall you may want an envelope-back opening that you can manage from the sides.
What fabric is easiest for beginners?
Cotton canvas and many upholstery fabrics tend to behave well because they don’t stretch much. Linen can look great but often needs more pressing and patience.
Will a cover hide tufting or buttons?
It depends on fabric weight and how deep the tufting is. Thicker fabric or adding a thin batting layer can soften the look, but deep tufts may still show as gentle dimples, which some people actually like.
Is it safe to use a staple gun on an upholstered headboard?
Many people do, but be careful around seams, piping, and any internal hardware. Wear eye protection and follow the tool manufacturer’s safety guidance, and if you’re unsure about the headboard structure, asking a professional upholsterer can be a money-saving move.
How do I wash or clean the cover?
Check the fabric care label before you buy. Removable slipcovers are simplest, spot-cleaning can work for upholstery fabric, and some materials may shrink if washed hot, so cold water and gentle cycles are often safer.
How much does this project typically cost?
It varies mostly by fabric choice and whether you add batting or trim. The good news is you can control cost by using a solid fabric, skipping piping, and choosing no-sew finishing if you already own an iron.
Can I do this as a renter?
A removable cover with Velcro or ties is usually renter-friendly because you’re not altering the wall or furniture permanently. If the headboard belongs to the rental, avoid stapling and adhesives that might leave residue.
If you’re trying to refresh a room fast and you want a result that reads clean on camera and in real life, a removable cover is often the most forgiving path, and if you share your headboard size, shape, and the vibe you want, it’s easier to suggest the fabric weight and closure that won’t annoy you later.